Monday, July 29, 2013

Garden Pics

December and January are long cold months here in ND.  In fact, so are February March and even sometimes April.

In an effort to combat the cold and gray that is winter I like to take a lot of garden pictures during the summer.  

They make me happy.

Plus, I can go back and see what I want to change for next year.

Here's some of the latest batch:


All images copyright Jessica Paulsen 2013. Please do not use without permission.

Wednesday, July 24, 2013

Menu Planning 201

I have just a few minutes to write today: I am waiting for a contingent from the Fargo Garden Club (Society?) to come and tour the yard this morning.   I did mention in on of the last posts that I started out menu planning with paper copies of the menu done in word and posted on our old magnet board by the computer. (N.B.: Fargo-Moorhead Horticulture Club)

I don't do it that way anymore, partly because it kept getting moved and falling off.  Our old calendar was also too small to record everyone's comings and goings. And truly, how many different calendars can I keep track of?  I wish I could say that I had a great techy answer like having an iPad installed in my wall so all the family can link calendar events like I saw on HGTV before we cut the cord, but no... This is a project on a budget again!

I needed a BIG dry-erase board.  I mean 3'x6' big.  I checked out the internet and most of the things I found were between 70-300 dollars depending on if they were also magnetic, and none of them fit my desired dimensions exactly.

Enter the DIY project!
I went to Lowes and got this:    panelling   and had them cut it for me so I could have the size I wanted (and that could fit in the back of my Saturn...)  It is great stuff: you can write on it with dry erase and it comes right off.  I know other teachers who have had squares cut for their classrooms so students can have their own whiteboards.

I also got the vinyl adhesive you can use with fancy cutters at Hobby Lobby and used my quilting ruler and razor wheel to cut thin strips of the silver.

I laid out the calendar so that we would have an easily accessible note side to keep track of things coming up. Then to label! I used the computer to print of some rub on words on Graffix Rub-on transfer paper for the word Notes and for the days and month.
New and improved menu board
As for hanging, I just measured and used a stud finder with washers and screws to hang it on the wall securely.

I am so happy with the calendar-- it has really made life easier around here.

Wednesday, July 17, 2013

Shopping (groceries not clothes)

I mentioned a couple of days ago that I started shopping differently when I decided that I was going to build a pantry in my basement storage room.

I had been really frustrated by how much our weekly grocery bill was, and how we always seemed to be out of one or more items when I was ready to cook.
Here's what I did to turn this situation around. And de-stress my dinner routine by about 45%.

First, I decided to make a simple meal plan. It's really not that difficult, and we don't hold to it like it is written in stone, but it sure helps me cut back on the "I should be cooking now, what am I going to make" blues. For a while, the plans used the calendar template from word and I just printed out a month calendar with the main dish typed in each square like this:
(Another post will follow on what I am doing with the meal plan now, but this is where I started)
None of the meals are new, they're all things we have on a regular basis and that I can cook without having a cookbook open. Plus, I know my family will eat the main part of the meal...
This way, I had an idea about what I was making, but flexibility with fruit and veg.  Sometimes we might plan for rice and the kids might want noodles or potatoes (not likely) but I can usually be flexible enough to change as needed.

When I started shopping with the pantry in mind then, I could stock up frugally for the month, and know what proteins we were going to need for the month's menu.  I could also plan to cook something like a whole chicken for supper, and use the leftover chicken for a pasta dish later in the week. I also gave myself a bit of a break by planning crockpot fridays (which I sometimes forget to start, but it is with good intentions....)

For the shopping piece, the biggest change I made was to start combing the sale sheets here in my hometown. Now, we do not get the local newspaper (picture a two year old destroying that on a daily basis and you will know why) but I can look at all the sale flyers online.  I look for items that I know we will be using and are at my target price or lower.  How do I know a target price you ask?

When I started researching the idea of keeping a pantry, a blogger I read suggested to start a small notebook that you can keep in your purse.  When you see items on sale, you can note down where you got it, and the price.  I organized my little notebook by food type: dairy, staples, baking, frozen, etc.
I think the thing about this is that it forced me to pay closer attention to where I was shopping, and when prices were actually good compared to an advertised sale.  I could also start to see patterns in the sales that the stores were running.

For instance, one local market had butter on sale this weekend for $1.99 a pound.  That's sure better than the $3.29 and up that it usually is, but my target price is $1.79 or less.  So, I did not stock up on butter this time. (FYI, the best time to buy butter is around Easter and Thanksgiving.) Stores may have limits on that $1.79 butter, but I may stop back 3 or 4 times during the week to replenish my supply. We keep a good supply of butter in the freezer so I never have to worry that I am out. (No, I do not buy margarine. I don't know what is in it, so we don't eat it.)

This system worked well for me for about a year.  I don't use the mini notebook as much anymore, because I kind of have those prices filed in my brain for the stuff we stock up on the most often, but I really want to start doing the notebook again for meat prices-- that's my next goal.

Here is a list of the things that I keep on hand in my pantry so you can get a basic idea of what I shop for:
  • Cereal
  • Cake mixes (handy for company, coffee cakes, potlucks, etc.)
  • Oil
  • Flour
  • Sugar
  • Brown Sugar
  • Powdered Sugar
  • Dried Fruit (Apples, Cranberries, Cherries, Raisins)
  • Peanuts
  • Peanut butter
  • Pasta: Angel Hair in multiple quantities and a variety of other shapes and egg noodles
  • Rice
  • Oatmeal
  • Ketchup
  • BBQ Sauce (I want to can my own this year)
  • Mustard
  • Mayo
  • Tuna
  • Beans
  • Chickpeas
  • Premade Spaghetti Sauce (for crazy nights--I'd like to can my own of this this year too)
  • Pretzels/Chips
  • Crackers
  • Coffee/Tea
  • Vinegar
  • Evaporated Milk
  • Sweetened Condensed Milk
  • Canned Soup-- Mostly Cream of Mushroom and Cream of Chicken for soups like Chicken Tortilla
  • Ramen Noodles
  • Rice-a-Roni (again for quick and crazy meals)
In addition to these, I also can produce. (That's why I don't have things on here like applesauce or tomatoes) More on that in my next post!


Tuesday, July 9, 2013

Growing out of control

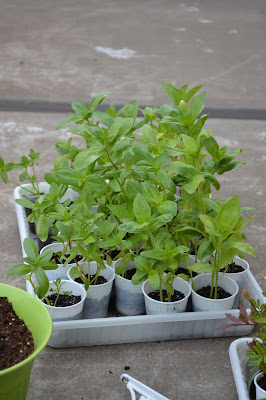
I was bemoaning our weather and wishing for spring just a couple of weeks months ago. (That tells you how much time I ever get to write here...)    I started some seeds the beginning of February in my small unfinished storage room/pantry and I was really excited because a lot of what I started was from seeds I collected in the garden last fall.
Marigolds, Salvia, Morning Glories
Sunflowers, Cosmos

I love the idea that I am getting a head start on planting, so that when I can get things in the ground, I can spend more time enjoying them, and less time waiting for the to sprout. 

Matter of fact, I started loving this idea maybe a little too much... Or maybe it was the spell that those darn seed packets were casting every time I walked past them at Lowe's, Menard's, and even the Supermarket.

Well, I decided I needed to increase
the space I had by purchasing one of those heavy duty wire shelving units when they were on sale at Target a couple weeks ago.

I was able to increase my seedling count from 7 trays to 35 as soon as I got it all rigged into place.
I got the 5 shelf unit, and had to cut down the legs with the hacksaw so that I could set it up on top of our workbench and not hit the ceiling joists.  I spaced out the shelves so I could hang the lights under each shelf and have room for the seed trays.

If you read my previous post you will already understand my need to be frugal about this, so I did not buy the seed trays with the cells that they sell at home improvement stores.  After considering them, I thought that they would need to be moved into larger pots sooner rather than later.  I ended up buying plastic 3 oz. drink cups (like for the bathroom) in sleeves from Walmart-- the Great Value brand.  I drilled holes in the bottom of the about 8 at a time.  I also got plastic trays that I can reuse from year to year for 25 cents a piece at Mac's.  I got seed starting medium at Lowe's and at Kmart-- I ended up using 5 bags this year.

Once I was finally done with all the planting, I washed and sterilized all my cups and trays so I can pack them away for next year.

After some reflection, I think there are a few things I learned for next year:
1. Don't plant morning glories, sunflowers, or snapdragons.
2. Start coleus, petunias, and moss roses earlier.
3. Take cuttings of geraniums and other plants to overwinter.

The garden is always a place for revision: mine is still changing as this is only the 3rd summer we have been in this house.  Here's how things are looking as the end of June/beginning of July.
Last year's new flowerbed

Amaranth on the deck

Cosmos, Salvia Farinacea, Allysums, Rosebush

New Fairy Garden


The back Garden


Saturday, July 6, 2013

Building a Pantry

This is not a doomsday post.
I looked at my husband about a year and a half ago and told him how much I resented our rising grocery bill.  We are a family of 5, and I felt like I was going to have to start selling body parts just to get a simple meal on the family table.

I was very frustrated.  I have a full time job teaching little people, and I wanted to spend less time in the car running to get that "one thing" to make supper and more time with my own kids.  I also did not want to go out and buy a book to tell me how to do all this.

 Let's face it folks, I'm cheap.

So, I started scouring the internet for ideas about pantries.  Now, understand, I cook for real.  And when I say that, I mean that my kids do not eat spaghetti-o's, we don't buy frozen pizza rolls, and my son told his grandmother that his mac and cheese was not really "from scratch" because she didn't make the noodles.  And I cook all the time.

But I did not have a pantry.

SO. Most of the pantries I saw were not the most practical for me. They were pretty, but smaller than what I had in mind and not really functional.  I saw one or two that scared me a little too-- like I said before, this is not a doomsday prepper kind of thing.  I don't need industrial sized cans of green beans and hoards of vegetable shortening.

 I started to take stock of the things that we did have, and organized them in a better way.  I have found that for me this means two things-- like kinds of containers and labels, labels, labels. The hubby and I installed pegboard on the unfinished storage room walls and painted it all with leftover paint from the shed outside.  That way, anything on the shelves would not fall back between the studs, smashing on the floor. Then the standards and brackets went up.  We reused some that we had leftover from our old house and had to purchase just a few more.
After a summer of canning and 4 months of stocking up

The footage we needed for shelving made prefinished shelves undo-able.  Remember, I'm cheap?
So we ended up getting widths of pine boards at Lowes that would work.  We installed the wider shelves closer to the bottom and the narrower to the top, with the highest shelf being wider for deep storage items like the knife sharpener and the trifle bowl. I put our small appliances on the wide low shelf so I can send kiddos down to grab the electric frying pan when we need it.

Then I looked at all the canned goods I had; both home canned and otherwise and sorted into groups. When summer came, I really became adventurous and tried canning/drying a lot of sale produce that I had not done before.  (Hello Ball Recipe book!)
After taking stock I decided that I was finally ready for part two of my evil plan (insert evil laugh here). Sorry--too much superhero tv. See the next post for info on how I changed my shopping habits.


This corner project was phase two after I realized our apple trees in the backyard would produce a bumper crop.

There were other things I did to make this a vibrant pantry that gets used all the time.
Here's the quick & dirty list:
1. Prep shelves/walls
2. Purge/organize/sort into categories
3. Menu plan (I have short dinner notes for a month at a time)
4. Shop smart, buy a few extra
5. Plant a garden
6. Can all you can, dry in the dehydrator

It's my plan to lay out a couple more things in detail because I think that we all learn from each other.  But that will come in later posts.  Right now, I need to get the two year old off the potty.  Yes, we are mid stream of potty training.   :)

More soon... Jess